
Protecting your boat with a T-Top Boat Cover is one of the smartest investments you can make. It shields your vessel from UV rays, rain, debris, and other damaging elements, extending the life of your boat and reducing maintenance costs. But here’s the catch: even the best T-Top Boat Cover won’t perform if it’s installed incorrectly.
Many boaters unintentionally shorten the life of their covers—or worse, leave their boats vulnerable—by making simple installation mistakes. To help you avoid those pitfalls, we’ve rounded up the top five mistakes boaters make when covering their boats, and how you can do it right.
1. Putting the Cover on Backwards
The Mistake: It sounds simple, but one of the most common installation errors is putting the cover on backwards. Not only does this make the fit look off, but it can also create unnecessary strain on the fabric, zippers, and seams—reducing the life of your cover.
The Solution: We’ve built in a foolproof guide to help. When you see royal blue, think of the front! For our T-Top Boat Covers, look for the royal blue webbing strap located along the collar of the bow. For our Center Console Boat Covers, check for the royal blue pull tab. These color-coded indicators are designed to take the guesswork out of installation so you can get it right the first time, every time.
Pro Tip: Always Start at the Bow: Positioning the cover at the bow first gives you a solid anchor point and makes it easier to stretch and secure the rest without uneven pulling.
2. Ignoring Sharp Edges or Hardware
The Mistake: Overlooking exposed hardware or sharp edges is a recipe for unnecessary wear and tear. Screws along the rub rail, cleats, or other fittings can rub against the fabric, creating small holes or tears. Left unchecked, these weak spots grow over time and compromise your cover’s effectiveness—shortening its lifespan and leaving your boat vulnerable.
The Solution: Before installing your cover, take a quick walk around your boat and inspect for anything that could snag or rub. Tighten loose screws or fittings, and cover sharp edges with a protective barrier. Even simple solutions work—many boaters use protective caps, old towels, or bits of padding. For an easy DIY hack, cut up pool noodles or tennis balls and place them over problem spots. A few minutes of prep can save you from costly repairs down the road.
3. Ignoring Additional Strapping
The Mistake: One of the biggest oversights during installation is skipping the extra straps provided with your cover. Many boaters either don’t use the full hard top strap kit (when it’s included for certain patterns) or forget about the 10 ft. crossing straps altogether. Without these, the center bow and aft collar straps can’t attach correctly, which throws off the cover’s fit and reduces its ability to shed water properly. The result? Puddling, sagging, and added stress on the fabric.
The Solution: Think of the additional straps as your insurance policy for a perfect fit. For certain patterns our Hard Top Strap Kits are specifically designed to give you extra connection points, especially on boats that don’t already have the ideal framework built in. By creating those attachment points, you’re setting your cover at the correct run-off angle, which allows rain and debris to slide off instead of pooling on top. Always make sure to use the 10 ft. crossing straps so the bow collar straps have the right anchors. Need a visual guide for the Hard Top Strap Kit? Check out the installation video below—it’ll walk you through the process step by step.

Hard Top Strap Kit Install Video
4. Skipping the Nose and Motor Straps
The Mistake: Another common error is overlooking the 10 ft. straps designed for the bow and aft. Many boaters either skip or fail to install these straps altogether. Without these connections, the cover can sag, leaving low spots where water collects. Over time, pooling water stretches the fabric, weakens seams, and shortens the overall lifespan of your cover.
The Solution: Always take the extra step to secure these straps. At the bow, connect the 10 ft. nose strap to the U-bolt or bow anchor. At the aft, connect the 10 ft. motor straps to the skeg or prop. Doing so creates the correct runoff angle, ensuring rain and debris slide off rather than collect on top. This small detail makes a big difference—your cover stays tighter, lasts longer, and does its job of protecting your boat.
5. Overuse or Over Tightening Straps
The Mistake: It’s natural to think “tighter is better” when securing your boat cover, but cranking down on the 10 ft. tie-down straps can actually cause problems. Over-tightening pulls the cover too flat against the boat and trailer, eliminating the natural slope needed for proper water runoff. Without that angle, rainwater pools on the fabric, adding weight, stretching seams, and reducing the life of your cover. Some boaters also add belly straps across the underside of the cover, which only makes the issue worse by flattening the material even more.
The Solution: Less is more. Attach the Tie-Down Straps from the cover to the trailer so they are snug but only slightly taut—secure enough to hold the cover in place, but not so tight that they distort its shape. Avoid using belly straps altogether, since they compromise the runoff design. By maintaining the correct angles, you’ll extend the life of your cover and keep it working as intended—shedding water instead of collecting it.
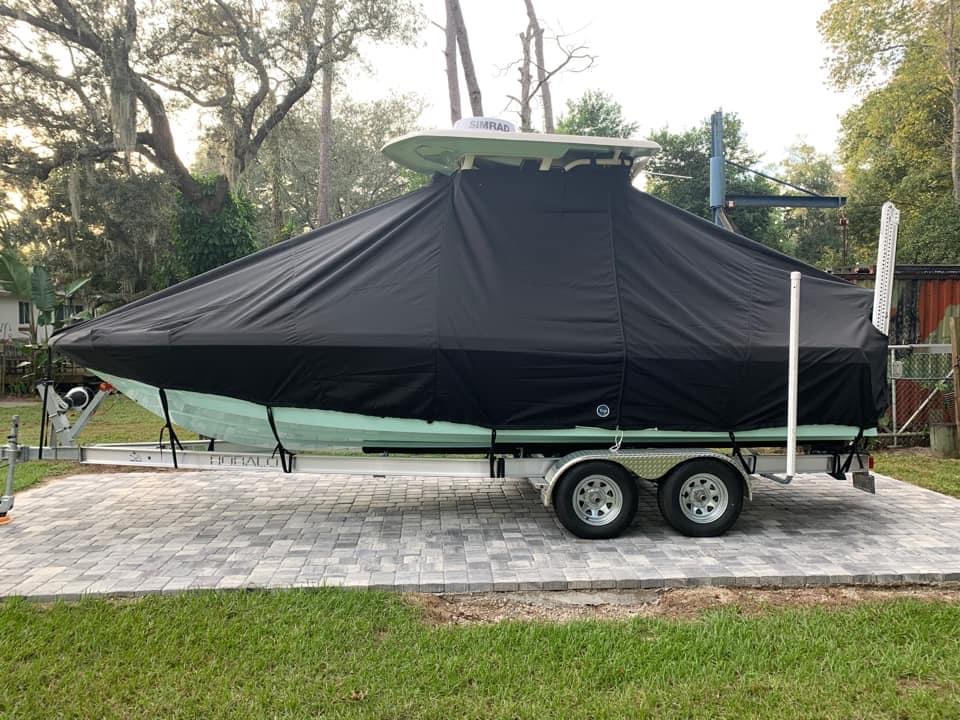
Final Thoughts
A T-Top Boat Cover is built to protect your boat—but only if it’s installed correctly. By avoiding the five most common mistakes—installing the cover backwards, overlooking sharp edges, skipping extra straps, neglecting nose and motor straps, and over-tightening—you’ll extend the life of your cover and keep your boat better protected from the elements.
Your boat is one of your biggest investments, and a few small adjustments during installation can make a big difference.
Pro tip: Once your cover is set up properly, snap a few photos of the strap placements and angles. Next time, you’ll have a quick reference to make installation faster, more consistent, and stress-free.
Protect your cover. Protect your boat. Enjoy more seasons on the water with less hassle.
👉Need help with installation? Our support team is here for you—reach out anytime at support@laporteproducts.com.


Do we ever need to spray on Scotch Guard on the outside of the cover to repell water after a year to extend the protection?
You can apply some sort of water repellent product if needed. We recommend 303 Fabric Guard. This isn’t necessary but can help extend the life of your cover.